Total Pageviews

Saturday, November 30, 2013

Wings - 14

November 30, 2013 15 hours - 257 hours total
It's been a busy month and you can see from the hours posting I've been busy assembling the left wing. I'm getting close to finishing this wing. I'd say 15 or 20 more hours. I have the wing tip and position light to install.

View of flaperon bracket installation prior to installing top wing panels.

Example of the wing skeleton, typical, prior to wing panel closure. I choose to primer only the contact surfaces of the interior wing. I did remember to remove the FOD.
Example of the priming method. This happens to be the lower mid-skin. You can see the access panel near the stall warning device.

 View prior to installation of the lower mid-section wing panel. Note primer on contact surfaces.
Interior side of upper wing panels are right for priming.


Inboard wing-walk panel primed and ready to install.


Top panels are cleco'd in place and ready to rivet. Inboard wing section primed  at location where wing walk panel is installed


Just a few Cleco's holding the panel in place.

With the exception of a few rivets I forgot to install, all panels are riveted in place. Must be 1200 closely placed rivets.


 View from the wing-tip. About seven pieces make up the wing tip assembly.


Sunday, November 3, 2013

Wings - 13

11/10/2013 - 5 hours, 242 hours total. I was able to put some time in on Friday and Sunday. All of the riveting for the bottom-side left wing is complete. I'll need to enlist some help to flip the wing over to continue the build.

Primed the lower middle left wing panel. As you can see, I'm only priming the contact areas of the wing.
 Picture of the wing assembly, mid-section, just prior to installing the above panel.
Also, primed the outer edge of the inboard and outboard panel where the middle panel mates.
Ready to flip and start working on the top-side


11/03/2013 - One year ago today, I placed the first kit order for the tail-kit.

8 hours, 237 hours total. Work began in earnest to begin installing the wing panels. Before I started that I replaced the two wire connectors damaged in the previous post. I then spread out a little so I could access the left wing. The wing in the foreground is now in the covered back patio. House rules- wife's car needs to fit in the garage.
 This is a view of the inboard, left wing, bottom side. There are approximately 450 rivet locations in this panel alone. I final drilled all the holes, deburred the holes, and then primed the interior side of the panel. I did the same with the outboard panel. The center panel is ready for final drill.

 Outboard review
 Bottom side access panel near the stall warning device.
 View inboard with new connector installed.
Riveting comes next......I'll rivet the inner panel, then final drill the center panel and debur, and then complete all bottom side riveting. Could be a couple of weeks before I get that done. We have visitors next weekend- good friends, and then a trip to check in on mom the following weekend.

Sunday, October 27, 2013

Wings - 12

Haven't put a lot of time in on the project the last couple of weekends. I hosted the EAA Chapter 81 at my house last weekend. Had about 16 - 18 attendees. Showed them the project to date. Had a good time!

This weekend it was the annual Copperstate fly-in. So, spent Saturday up there. Saw a couple of RV-12's. One looked great- builder did a great job. See, pictures below. Nice paint job- great attention to detail. The people in the picture are the judging the final product....don't know how he did.


My progress has been slow and I've had to take a couple of steps back. First, I wasn't real happy about the way I crimped the open barrel connectors. The contacts are for the landing lights, strobes and stall warning. So I ordered new contracts, removed the old contacts from the connector and installed new one's. Oh, most important, builders note.....read instructions first and get the right tool. Eric, EAA president leant me a proper pair of BCT-01 crimpers.

I'm pretty happy with the results.......oh yea, in removing the contacts, I cracked the plastic connectors. Two new connectors on the way- one male, the other female. $7.50 each.


So, now it's time for the big stuff. I started the process of smoothing deburring the first of the wing skins.

Left inboard

 The other 5 panels- these are wing bottom side and leading edge.

Sunday, October 13, 2013

Wings - 11

10/13-2013, 12 hours, 229 hours total. It's been a couple of wings since I last posted. I continue work on the left and right wings. Most of the time was dedicated to installing the stall warning device. I managed to drop the assembly and damage the little microswitch. I cracked the case at the attach point. So, ordered new parts of Van's. I decided to get a new rear stall warning attach bracket because of a poor countersink effort on my part. The particular hole is a number 19, and I don't have a pilot hole for that sized hole. Finally got the replacement parts and installed the device.
 Then it was time to adjust the adjust/calibrate the stall warning device. This required temporary cleco of the center skin to the nose ribs. You can see the switch lever.


Final adjustment and lock down
 Installed left and right wing landing light, strobes and wing tip light wiring.


Sunday, September 29, 2013

Wings - 10

09/29/2013 8.0 hours, 217 hours total. Had a productive day. I was able to finish the left wing and start on the right wing. Once again, I had help from Dane. Dane attached the tailing edge spar and then help set-up the build configuration for the right wing. 2.5 hours

Left wing forward stub spar attached.


Snap in grommets installed in each nose rib. This will support wiring to position lights on outboard wing. And the color of the position light on the left wing is....? All leftee's are red.
 Tailing edge, rear spar left wing is attached
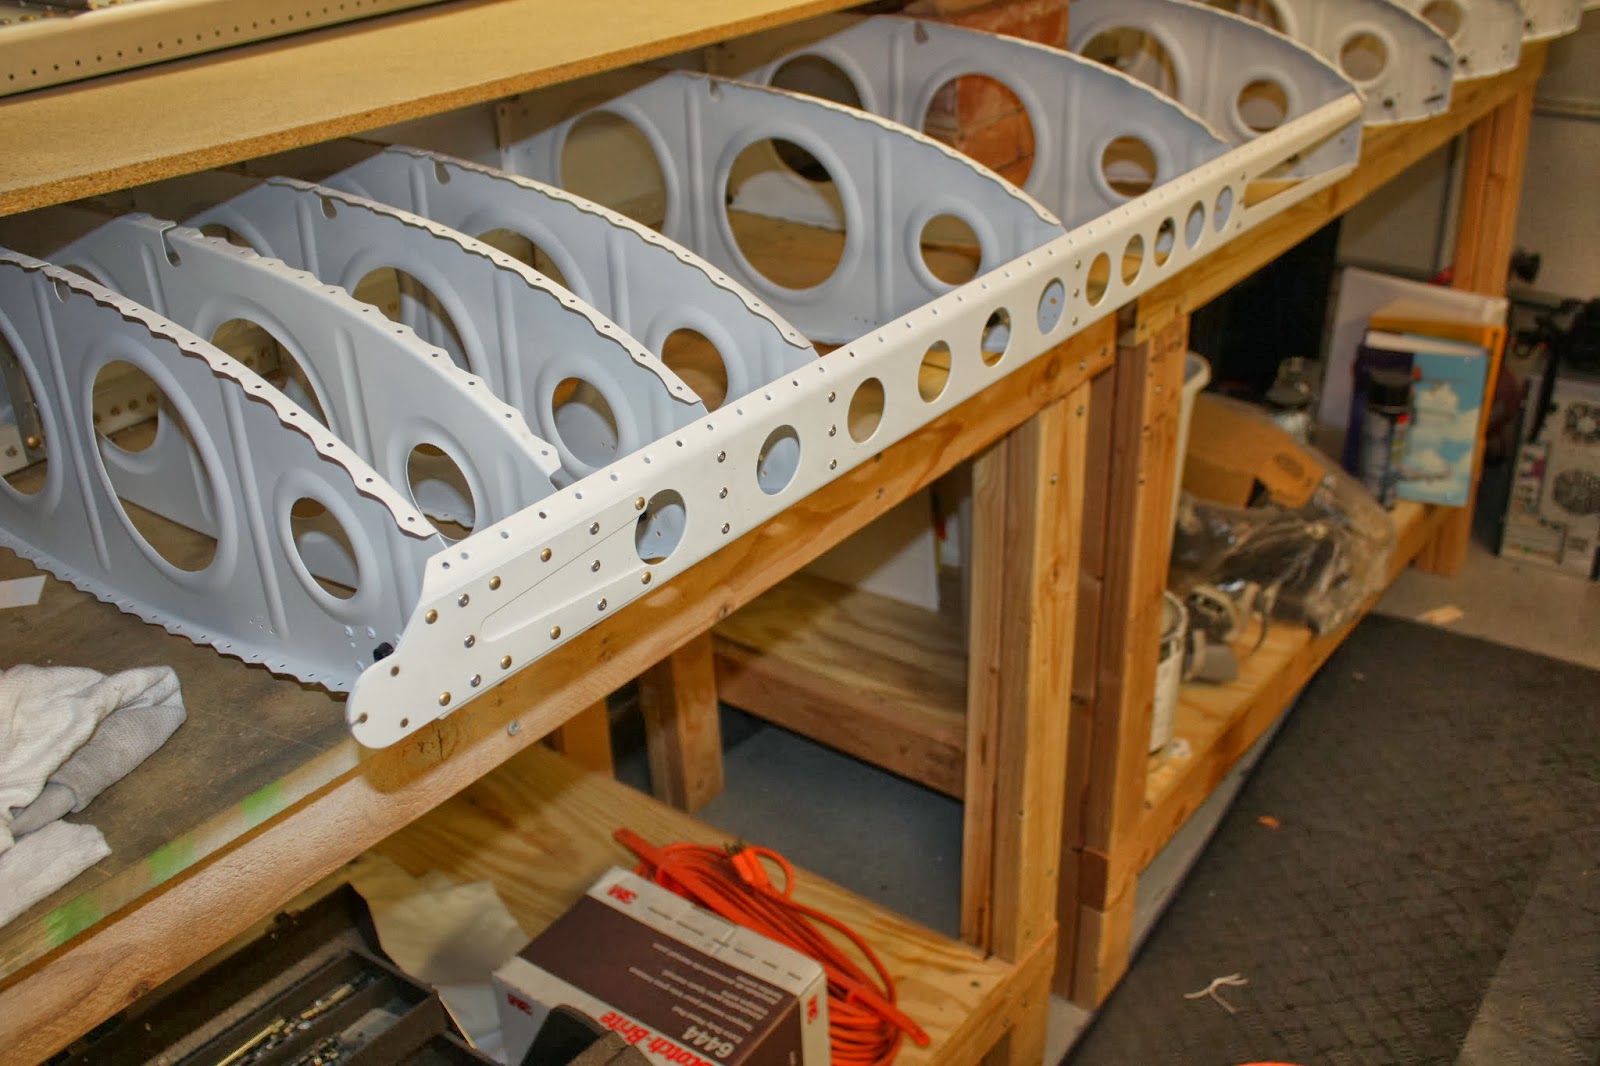
 Now I thought this was pretty clever. I'm running out of horizontal space, so I'm using vertical space. I'll build the right wing over the top of the left. It helps to be tall. The elevated platform is made of bricks and wooden shelves. Plenty of clearance and a stable platform.
 Here's another view....
 Right wing, main ribs are riveted in place. LP 4-3 and 4 - 4 rivets.
 Tipped on it's side ready for attachment of the rear trailing edge spar.
 Nose rib attachment to follow.