Total Pageviews

Sunday, May 19, 2013

Tailcone - 5

Sunday May 19, 2013 11 hours 132 hours total. I got a lot of work done on Friday and Sunday. This included routing the trim tab wiring harness, installation of the aft pitot system and installation of the side skins. I'm probably about 10 -12 hours away from completing the tailcone. It is taking longer than I estimated. That's okay, I'm likely the looks of this assembly. Work remaining includes installation of the F-12106 forward skin rib. This rib mounts to the top skin and the vertical stabilizer in turn mounts to this bracket. Also, I need to mount the top skin. I'll cleco the entire skin and verify the skin edging is adequate.I want/need a nice seam. We'll see! Oh, and then there is the ADAHRS Brackets that also mount to the Top skin. So what is the ADAHRS  you ask? It is part of the Dynon avionics system. It is the SkyView Air Data Attitude and Heading Reference System module. It mounts near the forward frame of the tailcone and is included as part of one of the final kits. The Dynon 10" Skyview system. 

Left side pilot reference. Actual a 1/8 inch rivet with the shank drilled out. There is one on each side.

Here's a picture of the 1/8 tubing attach to the pitot, prior to sealing with RTV.

 The right side tubing attached to the forward frame.
 The installed tee fitting for the left and right side pitot lines.
 And, a photo of the forward pitot reference line which is run along the left side j-stiffener in the side skin.
 The system as the stands prior to installation of the fuselage section and avionics. No further work at this point.
 Photo of the builder standing next to his project!
Side skins, left and right are riveted in place,except for the rivet holes seven inches in. The fuselage and tailcone attach will utilize these holes.

 Just mounting the dimpled nutplates to the forward rib skin that I mentioned previously.
 And here is where I quit for the weekend. Just a test fit of the skins at this point!


Saturday, May 11, 2013

Tailcone - 4

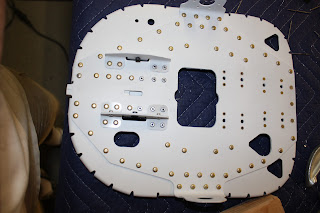
Saturday May 11, 2013 7 hours, Total 121 hours. Today was a productive day from the standpoint that I was able to finally begin assemblying the major components of the tailcone assembly. Pictured below is the F-1282-L, left skin, post material removal. I believe the material is there to stiffen the skin during the handling process. 

 Then it was time to install the F-1284-L and R Shear clips to the F-1283A and B stiffeners.
 Four each LP4-3 rivets.The stiffener is probably 18 inches long and attaches to the F-1282 L and R skins. These are the skins on the bottom of the fuselage.
 I used boxes instead of sawhorses to cleco the frames to the skins [F-1282 L and R]. Space in the garage was a little tight during this operation.
 Then it was time to cleo left and right side lower skins. The instructions say to use masking tape over the fastener holes 7 inches from the forward edge. We're eventually attach this piece to the fuselage and cockpit.
 You can see the hole for the tail tie-down.
 The sequence was to, 1.) rivet the F-1282 L and right skins together, then 2) rivet the frames to the skins, all four, and then 3) rivet the F-1281 L and R side skins together. I ran out of cleco's so there has got to be 375 or so rivets to place.
 And here we are after rolling the assembly  ao the frames are facing up.
 An interesting view of the three frames. You can see the stiffeners molded into the skins.

 An example of the finished produce- all the LP4-3 rivets...
 It is truly riveting work! [sorry, bad I know]. I'm expecting a call this week indicating a ship date for the wings.


Sunday, May 5, 2013

Tailcone - 3

Monday May 6th, 2013 - 3 hours, total 114 hours. Okay, one final edit to this post. I had some free time at the end of the day today. I primed, or finished priming all the skins. The wings kit is a week from shipment and I wanted to make sure the tailcone is assemblied prior to arrival. Don't know if I'll make it, but at least I'm ready to assembly. No more parts prep left.


Sunday, May 5th, 2013 - 4 hours, total 110 hours. I was back to the garage today for some additional work on the tailcone. I was supposed to fly this morning,but the winds were a little strong and I canceled at the last moment. All work today was associated with the F-1211 assembly. One page of instruction in the Van's manual, and a lot of rivets. I counted 87 total with 6 different fastener types.

First task was assembly of the F-1211D attach brackets. Pictured is the right bracket assemblied with two LP4-3 rivets.
 Next is installation of the interference fit bushing. Van's recommended a C-clamp with a small socket on the opposing end. It worked quite well.
 A here's a picture of the final assembly.Pretty easy stuff- went quickly.
Pictured here are the F-1211A and B bulkhead and bulkhead doubler prior to assembly. The instructions talk about fluting the F-1211A flange. I did not do this because it didn't look like it needed adjustment. We'll see....
 F-1211A and F-1211B cleoed together with the attach brackets.
 The attach brackets where the bushings are attached fit into the bulkhead cut-outs.

 Next, and this is just for illustration, is the flange bearing. One on each side.
 And here's the right side bearing installation with the right hinge bracket.
 Now the real work begins. The installation of the 87 rivets I mentioned previously.
 And probably 2.5 hours later the two bulkhead assemblies are attached.
 If you enlarge the next two pictures you get an idea of the variety of fasteners used. Yes, the hands are a little sore this evening. A lot of squeezing going on.

 And here's a couple of pictures of the hinge bracket and bearing installation.
 On the backside of the bulkhead assembly are the 8 nut-plates and the tail tie-down braacket assembly. I have to do a little primer touch-up. A lot or manuvering with the rivet squeezer to reach all the rivets - a lot of handling period.!
Next task will be to pull out the stabilator and check the fit with the F-12111 Assembly hinges.

Saturday, May 4, 2013

Tailcone -2

Friday, May 3rd 2013- 4 hours Approximately 106 hours total - Okay- managed to find some time to work on the airplane. Priming is done for the smaller components. Now it's time to rivet. It's been a long time coming. F-1208 fame and associated wear plate went together no problem. This is assembled with the LP4-3 pop rivets- no problem

 Then it was on to the F-1209 frame- easy job- 8 pop rivets- again, no problem
 Then it was on to the squeeze rivets. AN470AD4-5 on the top row. AN470AD4-4 for the remaining eighteen. I installed and drilled out 12 or 15 of the rivets. This includes removing all the rivets on the left hand side. The left hand side, bottom right corner of the frame seemed to be slightly pulled-away F-1210B plate. No much, just enought to drive me crazy. Thought I'd start over to see if it would fit better. Slight improvement, but still sticks out a little cosmetic only.
Saturday May 4th 2013 6 hours, 112 hours total- Today it time to tackle the tailcone skins. The task was/is to prime the nine panels. Not in the garage this time but outside, in the included pool utility area. First time for with a spray gun. Lots of challenges but the bottom line is I got six of the nine panels primed. Pre-prime set-up photos below! This worked out well- I just had a lot of challenges with the sprayer. I believe my issue was associated with thinning the paint.

 Yhen I had a little visitor- Didn't let him near the spray gun. It scared the you know what out of me. Almost stepped on it. New shorts please!