Total Pageviews

Friday, December 5, 2014

Fuselage - 5

December 05, 2014
30 hours - 465 hours total- I've really lost track of the hours I've put in since October. I think this is a good estimate, plus or minus 5 hours. If I had my way I'd spend all my free time working on the airplane, but that's not reasonable. You've got to balance activities, make sure all members of the household aren't neglected. Then there are the chores around the house, the little honey do's and of course work to pay for the project.

As you can see from the pictures below, I have continued to make progress on the fuselage section. This section of the airplane contains many, many nutplates and a whole lot of dimpling. The RV-12 design is outstanding- I say that because it is a assembly that can be performed with basic tools. The design makes complete sense.

In this picture I have the lower fuselage section on it's side for some hard to reach rivets.
 A picture of an error- instructions said this would be a good time to install the Section-35 autopilot brackets. I ignored that direction because I was sure these parts were contained in the next kit. Wrong, that come with the fuselage kit. I had to cut this section out before installing a mounting bracket. I was able to get a hacksaw in to remove the material, and drill required holes with a 90 degree angle drill, but it was tight.
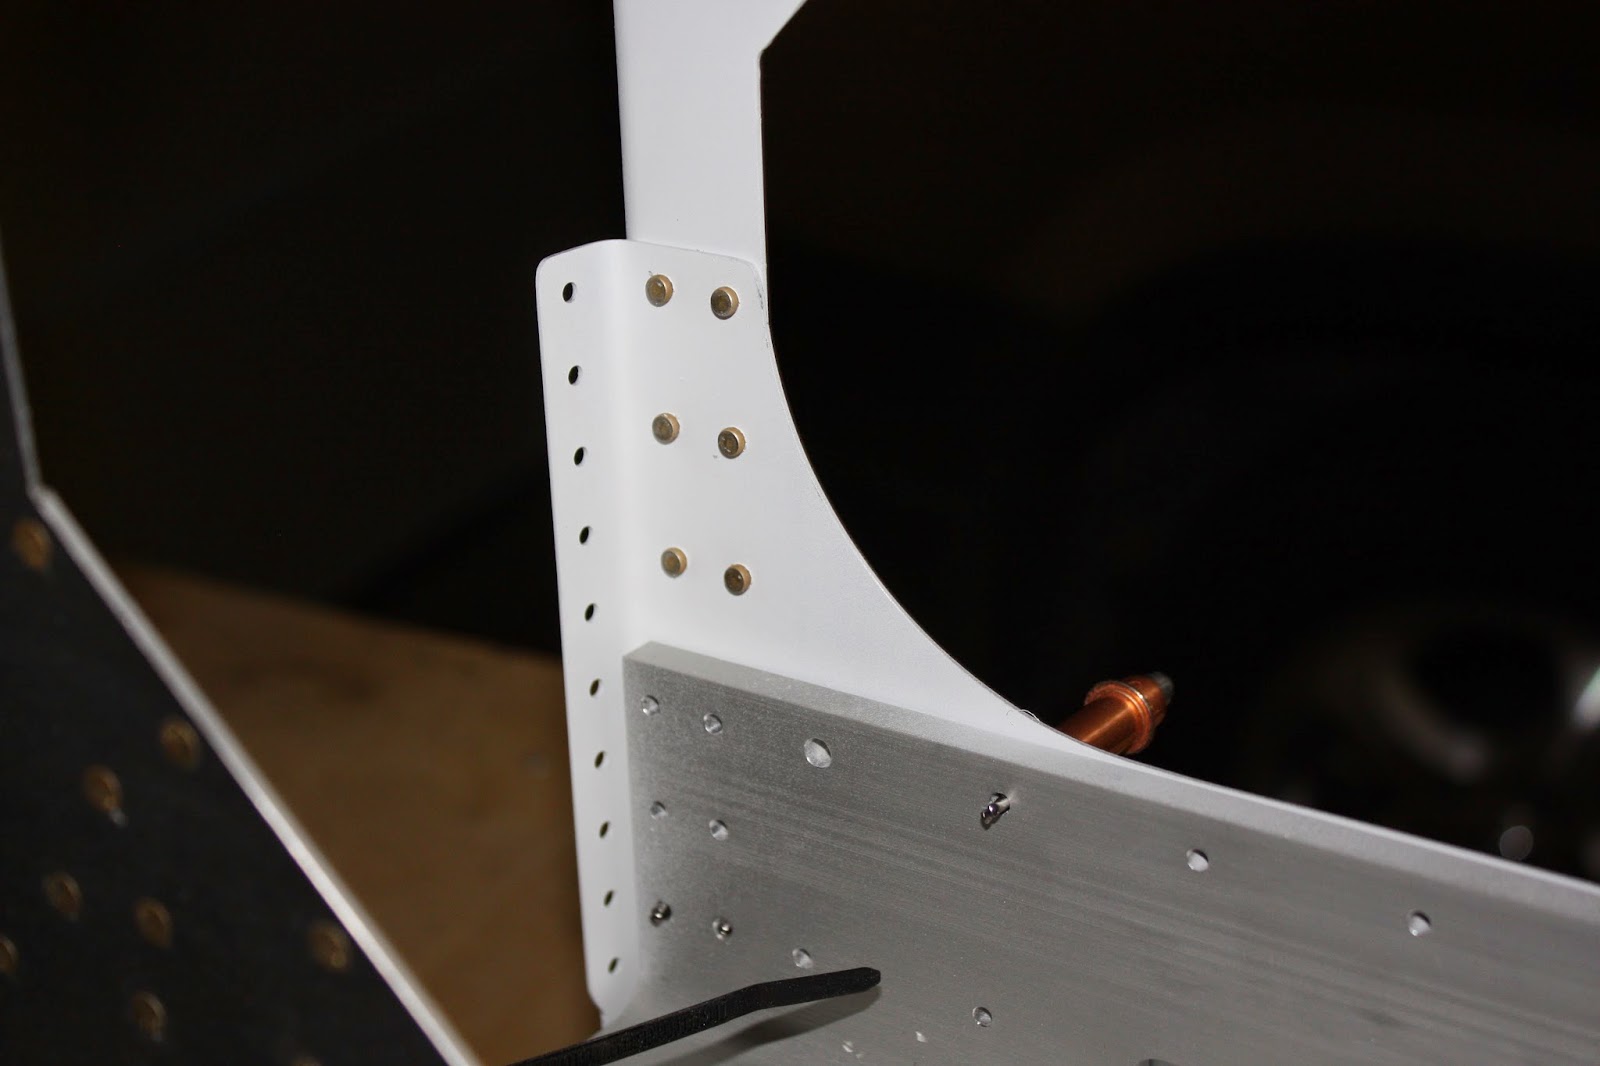
 See the nutplates- they're every place! This is a photo of the F-1203 bulkhead assembly with the Control Arm mount assemblies and left and right bulkhead doublers. The control column will mount here! Stick back nose goes up, up forward, nose goes down!
 If you look to the right, on the F-1203 bulkhead you'll see the Stub Spar receptacle. If you recall the stub spar on the inboard left and right wing, the stub spar fits into this assembly once the wings are installed.
 Another view of the 1203 bulkhead ready to install.
 Cleco'd in place and ready to rivet in place. You're looking at the forward end of the airplane.
 What do you see? Yep, more nutplates! You're looking at the backside of the 1203 bulkhead. These are the seat assembly ribs.
 Lower fuselage assembly- I keeps getting longer as I build forward toward the firewall. Again, you're looking at the forward or nose of the airplane.
Here's a photo, temporary installation. The 1203 bulkhead with the step ribs being installed- actually match drilled at this point.
 Another view of same assembly.
 Okay- today, 12/05/2014, I had a friend stop by to help me flip the fuselage on the bottom side. Need to install side and bottom skins next!

 In this view you can see the control column installed, and yes, more nutplates!
More to come!!

Sunday, October 5, 2014

Fuselage - 4

October 05, 2014 - 16 hours, 425 total hours on the project. This is a summary of work performed over the past two weekends. Focus of effort was assembly of the left and right seat floor assembly and associated subassemblies.

First task was to prepare all subassemblies that make up the pulley brackets; flaperon mixer are assembly; seat ribs; and finally, the left and right seat floor assemblies.

In this picture you can see the elements of the pulley and flaperon mixer assembly. Priming complete.
 Pictured here are the seat ribs. There are four ribs each, left and right seat.
 The pulley bracket assembly is then cleco'd and riveted.
 This  is the completed pulley bracket assembly that mounts between the middle two seat ribs of the right set floor assembly.
 Here is the completed flaperon mixer assembly. It mounts to the inside left seat assembly. The mixer is essentially towards the center of the fuselage.

 Here's an error that I'll point out. My mistake- if you look at the left nutplate attach, bottom rivet, you can see an extra dimple hole. The dimple die was off a little bit and I managed to create a new hole.
 Pulley bearing mounted between the two inboard seat ribs.
 Flaperon mixer mounted between  the two left inboard ribs.


 The next few pictures show the left a right seat floor assembly attached to the center section bulkhead.


 Bushings in place on all ribs. Still need to complete riveting of the assemblies to the bulkhead.


Fuselage - 3

September 7, 2014 - 18 hours, Total 409 hours

Over the past two weeks I'm made good progress. The last two weekends have been spent installing the baggage floor, or the aft portion of the fuselage. Work has included installation of the floor surface and supporting structure.
As you can see, I made considerable progress before taking my first picture. Not sure how that happened.
In the next few pictures you can see the left and right baggage skins and support structure.
View of aft fuselage baggage area. Baggage bulkhead and ribs. Also, center lower horizontal piece is the bearing bracket brace.
Baggage section tilted up to see baggage skins, left and right side.

View from the opposite, under side with supporting structure attached.
Nice view of the two bears bracket assemblies attached to thebaggage ribs.
I shoukld say- there are plenty of nutplates and the associated dimpling that must take place. Here's a view of a number of them from the bottom side.
A view of the nutplate from the top.
Pictured here are the spar receptable and support.

Here's a nice view spar receptable and receptable support.


Sunday, August 24, 2014

Fuselage -2

August 23, 2014, 8 hours, 391 hours total
Work continued on the assembly of the Center Bulkhead, section 20 of the fuselage build. I countersunk the center section with the #30 100 degree countersink. The aft bulkhead is assembled with a combination of different type and sized rivets. Half of the rivets are flush, the other round head rivets, 426s and 470s respectively. The right aft bulkhead require flush head while the left half the round head rivets.

Assembly of the center bulkhead requires the left and skin attach flanges, two different sized skin stiffeners in addition to the aft bulkhead.

Pictured below are the left and right aft side bulkheads, and skin stiffeners, primed and ready to install.
 The aft bulhead is shown prior to assembly.
 Pictured below are the left and right skin attach flangles.

 These next two pictures show the two flanges installed on the aft bulkhead using seven each LP4-3 rivets.You can see that I primed the attachment locations only.

 Installation of the left and right bulkheads included AN470AD4-4, AN470AD4-9 and LP4-3 rivets.


 A photo of the formed head side of the rivets. Pretty consistent if I say so myself.
 In the next two photos you'll see the mix of AN426 and AN470 rivets along the upper roll of aft bulkhead attach.

 Next two photos show the left and right skin stiffeners attached with CR3213-45 draw rivets.

 Only three rivets installed in the second row of attach points. This completes assembly of the center section bulkhead.
 Section 21, Mid Fuselage Ribs and Bottom skins is next. The completed assembly looks pretty complex. Should be fun!!