Total Pageviews

Sunday, August 10, 2014

Fuselage-1

August 10,2014, 6 hours, Total 383
Well, the RV-12 build process has started once more. On June 21 I posted that the project was on hold as we changed homes. Well it's been almost two months of a lot of work, frustration, and satisfaction, but we're finally settled in and I'm able to continue with the project.

I was able to put about six hours in after finally getting the shop in order. I'm still building in one side of a two car garage. I'll work from the garage until it's time to connect the fuselage and tail section. I'm estimating another year.

What is pictured below is the aircraft center section. This is the primary load carrying section of the airplane. The main landing gear and wings will be anchored from the point.

The first task is to install one each outboard nutplates the two inboard nutplates.


The next task was to install two retainer blocks, one to the center section, pictured below, and one on the right forward bulkhead side assembly, not pictured.

Then the big work started. First the aft bulkhead is attached to the center section bulkhead using clamps and two AN4 bolts. Next, the section is lowered onto the lower fuselage skin. The clamps are loosened on the aft bulkhead and aligned with the skin. You know when everything is aligned because you're able to cleco the skin to the center and aft bulkheads. Once the alignment is complete, the work begins by match drilling, 73 locations, so the aft bulkhead can be attached to the center section.
 Yes, I said 73 match drilled holes. The aft bulkhead skin is pre-drilled. It gets attached to center section aluminum angle iron, U-shape.
 You can kind of see the angle iron in this photo. The fuselage skin has been removed and will be attached later.

 
A lot more work let to go, but not a bad start. 

Saturday, June 21, 2014

Status June 2014

June 21, 2014-

The project is on hold while we change households. I expect to resume the build mid-July or early August.

Thanks
Jim

Sunday, May 18, 2014

Wings - 21

May 18, 2014 25 hours, 377 hours total. I finished the wing build today, nearly 11 months after the start of the build. Total wing build time equals 230 hours. This is actual prep and assembly time- hands on the airplane. That averages out to be about 5 hours per week, shy of my goal of 8 hours per week. But as friends tell me, I still have a full time job.

I'm very satisfied with the build and the quality of the build and Van's design. I'm not sure how many 1000's of rivets I went through, but I put a pretty good dent into the box of rivets provided. I'd guess close to 3,000 rivets pulled.

My wings include the landing and position lights in addition to wingtip strobes. All were tested proior to final assembly and all functioned proberly.

Picture of all the flaperon skins prior to prepping. Additionally the flaperon longerons are in the backgroung.

Flaperon ribs, eleven on each side, along with the nose ribs and counter-balance assembly in the background.
Flaperon actuator bracket and inboard flaperon hinge point. The three rivet on the inboard side of the actuator bracket were very difficult to set. Took a couple of tries and a few choice words, but I got it done! Looks like the actuator bracket will insert into a groove [tongue and grove] in the fuselage for actuation and flaps operation.
 Flaperon outboard skin with counter balance assembly. Thr counter balance [pipe] is initially attached with one rivet each to two mounting brackets. The pipe and leading edge skin are then match drilled 13 places. You can see the cleco's on the forward edge. Lining everything up and drilling into the steel pipe was a real challenge, bu it did come together nicely.
 Counter-balance riveted in place!
 Now it's time to install and rivet the trailing and leading edge skins.
 A like magic, I have two completed flaperon assemblies, one the mirror of the other!
 I'm 4.75 jars through the project, I'd guess about 4500- 5000 rivet shanks!
 A end view of the flaperons showing a profile view with counter balance assembly
 Then it was back to the wing tip fairings. The black compound is two part engine sealant. It went on a lot better than I thought. The material comes in a single tube. A dasher rod is used to dispense and mix the concoction. It was applied using a chauking dispenser. Man I'm glad it went on right. The stuff is like tar and sticks to everything. It went on much better than I thought! As you can see, rivets are in place
 Once the sealant is mixed, that's it- what you don't use goes to waste. I probably used less than a third of the mixture. [Lesson learned- I was afraid I wouldn't have enough and ordered large.] In the trash!
 Both wing assemblies are in the craddle, position lights installed along with flaperons!!! Done! Into the Fuselage.


Sunday, April 27, 2014

Fuselage- 1

April 27, 2014 - 10.5 hours, 352 hours total. It has been almost  month since I last posted. Progress continues on the airplane. It's been a busy month and unfortunately I've only put in about 10 hours on the project.
Last weekend I spent approximately 6 hours inventorying the fuselage kit. The kit arrived the first week in April. We were in Southern California at the time. The fuselage kit contians about 400 subassemblies, not counting the various fasteners, nut-plates, bushings, rivets etc. It's great to have things like fuel lines, brake lines, pedals, control columns etc. It's beginning to feel like a real airplane. I'm guessing it's going to take the better part of a year for meto complete the fuselage, we'll see! The wings, which aren't quite done took me nearly a year so far. Need to finish up the flaperons......working on them!!!

Talking about the flaperons. Here are the 22 ribs, 11 per side. All have been deburred and are ready to prime. I spent about 4 hours in the garage yesterday preping all of the other flaperon components. Everything is ready to prime, and then the fun part- assembly.

Fuselage kit inventory complete- majority of parts placed in a storage cabinet. The others, including some skins that you can't see are still in the shipping crate. Doesn't look like a whole lot, but beleive me, plenty of little pieces to assemble. Should be fun.


Sunday, March 30, 2014

Wings-20

03/30/2014 21.5 hours, 342.5 hours Total Time.

I haven't posted in the last month, but I have made progress on the airplane. Since my last post near the end of Feburary I've put 21.5 hours in on the project. I haven't taken a lot of photos primary because the right wing has been a repeat of the left. I have completed:
- Inboard Wing Doubler
- Outboard Hand Grab
- Wingtip close out
- Fairing Prep
- Flaperion initial build

A picture of the wing wing upon completion of the inboard wind doubler. Lower left hand picture
Preliminary work on the longeron....


Wingtip fairing extension. Wingtip position light will reside here someday.

Left and right wing are ready to have the fairings attached. Have ordered engine sealant to go around fairing, and then rivet and light installation.

 Both wings are now in their cradle and final wing work will focus on the longerons.
It has been a very long time since the workbench has been cleared off.


Final job is to complete the longerons. 
 Fuselage kit was ordered in February- hopefully I have two or three weeks to finish the longeerons before beginning the new kit inventory.


Sunday, February 23, 2014

Wings - 19

2/23/2014 7 hours, 321 hours total.
Work continues on the right wing. I tested the landing light and verified continuity of all conductors. Additionally, I installed the outboard and mid upper wing panels.

To test the landing light I used two 9v transistor batteries connected in parallel. I used test leads with alligator clips on each end. I used the skin of the aircraft for ground and then attached the positive clip to the appropriate contact at the wing root connector. Both modes, on and pulse worked just fine.
 After operation of the landing light was verified I preped the outboard and mid upper skins for installation. Again, this included deburring, sanding, priming and finally riveting to the wing structure.
 All closed up- next week I'll close out the tip.
Builders Note:
Right now I have a total of 321 hours logged on the project. 142 hours for the tailcone and 172 hours on the wing. Since I didn't complete all installations on the tailcone, I'd guess I probably have 50 hours work remaining on the tailcone and probably 50 hours left on the wings. So my estimate is that both assemblies will take about 420 hours to complete. Van's estimate for the entire aircraft is 700 to 900 hours. I'll definitety be closer to or over the 900 hour mark.

I'd be interested to hear from any builders out there and what your totals are. It's not a competition, I'm only trying to judge progress. I don't believe I'm taking any short cuts, but my total hours seem low.

Sunday, February 16, 2014

Wings - 18 Landing Light Installation

2/16/2014
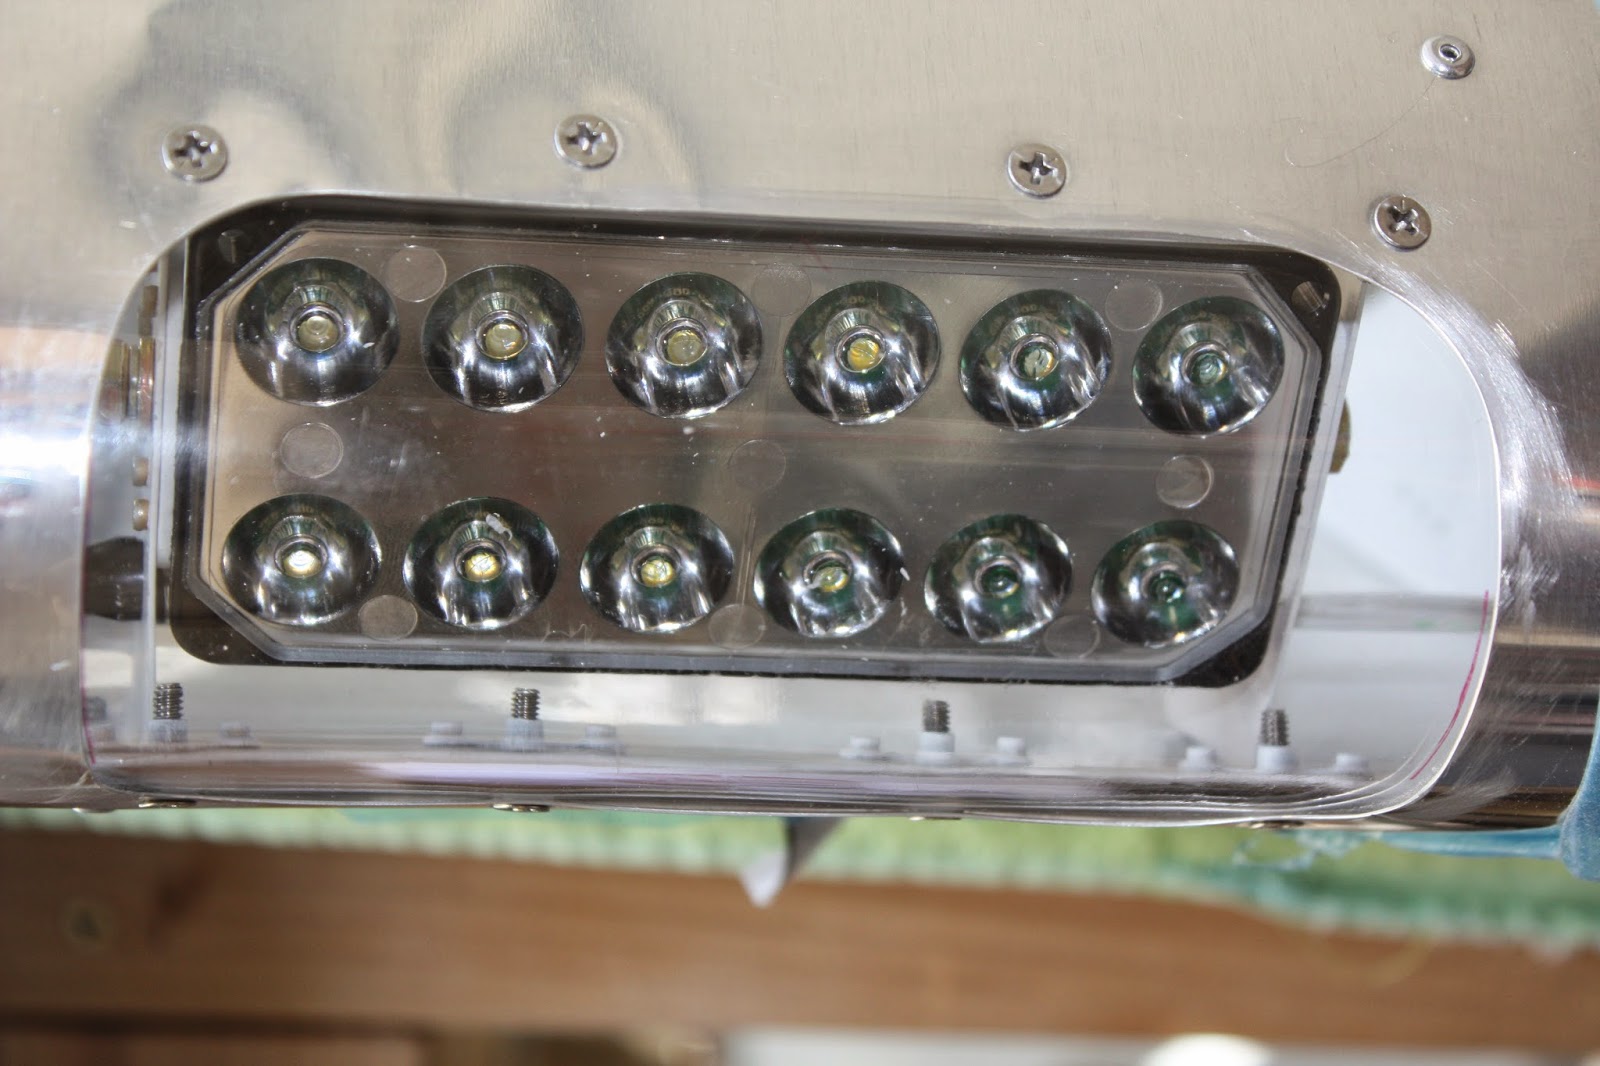
6 hours, 314 hours total. Man, tough couple of days with the installation of the landing light. Finally finished with a lot of consultation. This was not an easy task, in my opinion.

First task was to assemble the landing light ribs. Pretty easytasking. Installation of the gorunding wire, grommets and doubler plate/
 View from the rear after probably 5 hours of frustration. The instructions say to install using AN3-3 bolts and 'aeroled washers'. I found the bolts but could not locate the washers. I searched through the kit and found a packet with the washers and two allan head screws. Aw, I decide, this is probably what I need to use. Wrong. Soon as I attempted to tighten the screws the allan wrench would slip. I couldn't get the screws to tighten down. Next morning after doing some research I discover that Van's doesn't use the screws that come with the kit and instead provide the AN3-3's.....because of space limitations.

Next morning I attempt the install one more time. Still couldn't get the light tightened with the provided hardware. I then decided to switch out the AN960-10L washer with a AN960-10 and presto. it worked!!

I honestly do not know how you would install once the wings were covered.

View form the rear after installation. Instructions say tie wrap as necessary- I just followed the pictorial in the Van's instructions.


 One hour later, lens installed!